How to create a UML sequence diagram
A sequence diagram shows how a group of people or systems talk to each other to get one job done. It answers questions like "who calls whom, in what order, and what comes back?" That makes it one of the most useful diagrams for explaining APIs, login flows and integrations between services.
This guide builds a sequence diagram step by step using PlantUML syntax, which you can paste straight into Dev Studio's Sequence Diagram tool.
How to read a sequence diagram
- Participants sit along the top, from left to right. Each one is a person, service, database or queue.
- Lifelines are the dashed vertical lines below each participant. Time flows downwards.
- Messages are horizontal arrows between lifelines, drawn in the order they happen.
- Activation bars are thin rectangles on a lifeline that show when a participant is busy handling a request.
Step 1: choose one scenario
A sequence diagram describes a single path through a system, such as "a user resets a forgotten password". Trying to show every possible path at once makes the diagram unreadable. Write the scenario as a sentence first, then list the participants it touches.
Step 2: declare the participants
Declare participants in the order you want them to appear. The keyword controls the shape:
@startuml
actor User
participant "Web app" as Web
participant "Auth service" as Auth
database "Users DB" as DB
queue "Email queue" as Mail
@enduml
as creates a short alias, so you can write Web in messages instead of the full display name. Besides participant, actor, database and queue, PlantUML also offers boundary, control, entity and collections.
Step 3: add messages
The arrow style tells the reader what kind of message it is:
| Syntax | Meaning |
|---|---|
A -> B: text | Synchronous call: A waits for B |
B --> A: text | Reply or return value (dashed line) |
A ->> B: text | Asynchronous message: A doesn't wait (open arrowhead) |
A -> A: text | A message to itself, such as an internal step |
A ->x B: text | A message that is lost or fails |
Label messages with what is being asked for, like POST /reset or find user by email, rather than vague words like "process".
Step 4: show who is busy
Adding ++ after a message starts an activation bar on the receiver, and -- ends one on the sender. The return keyword sends a dashed reply back to whoever made the last call and closes its activation, which keeps nested calls tidy:
@startuml
participant Web
participant Auth
database DB

Web -> Auth ++: login(email, password)
Auth -> DB ++: SELECT user
return user row
Auth -> Auth: verify password hash
return session token
@enduml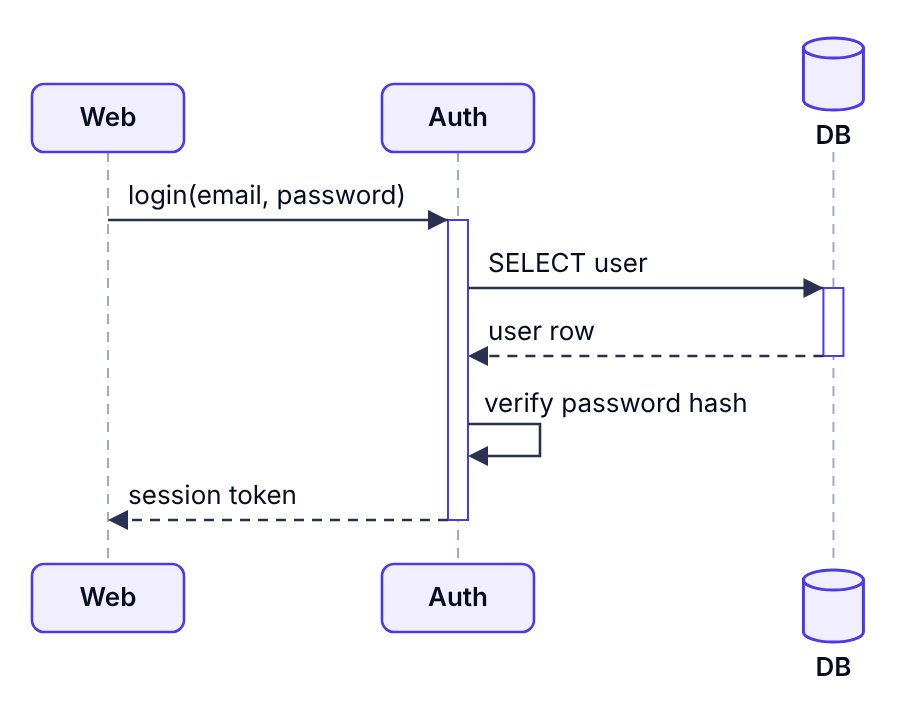
Step 5: handle choices and repetition
Real flows have branches. Group messages with these blocks, each closed by end:
alt…else…endfor either/or paths, such as success and failure.optfor a step that only happens sometimes.loopfor repetition, such as retries or polling.parfor messages that happen at the same time.
Step 6: add notes, dividers and numbers
note right of Auth: Token expires in 15 minutesattaches a note to a participant.== Phase name ==draws a divider across the diagram to separate stages.autonumbernumbers every message, which helps when you discuss the diagram in a meeting ("look at step 7").
A complete example: password reset
Here is everything together. Open it in the tool and try removing the alt block to see how much information it carries.
@startuml
title Password reset
autonumber
actor User
participant "Web app" as Web
participant "Auth service" as Auth
database "Users DB" as DB
queue "Email queue" as Mail

User -> Web: Click "Forgot password"
Web -> Auth ++: POST /password/reset {email}
Auth -> DB ++: find user by email
return user or nothing
alt email is registered
  Auth -> Auth: create one-time token
  Auth ->> Mail: send reset link
  note right of Mail: Delivered by the\nemail worker
else unknown email
  Auth -> Auth: log attempt
end
Auth --> Web --: 202 Accepted
Web --> User: "Check your inbox"
== Later ==
User -> Web: Open reset link
Web -> Auth ++: POST /password {token, new password}
Auth -> DB: update password hash
Auth --> Web --: 204 No Content
@enduml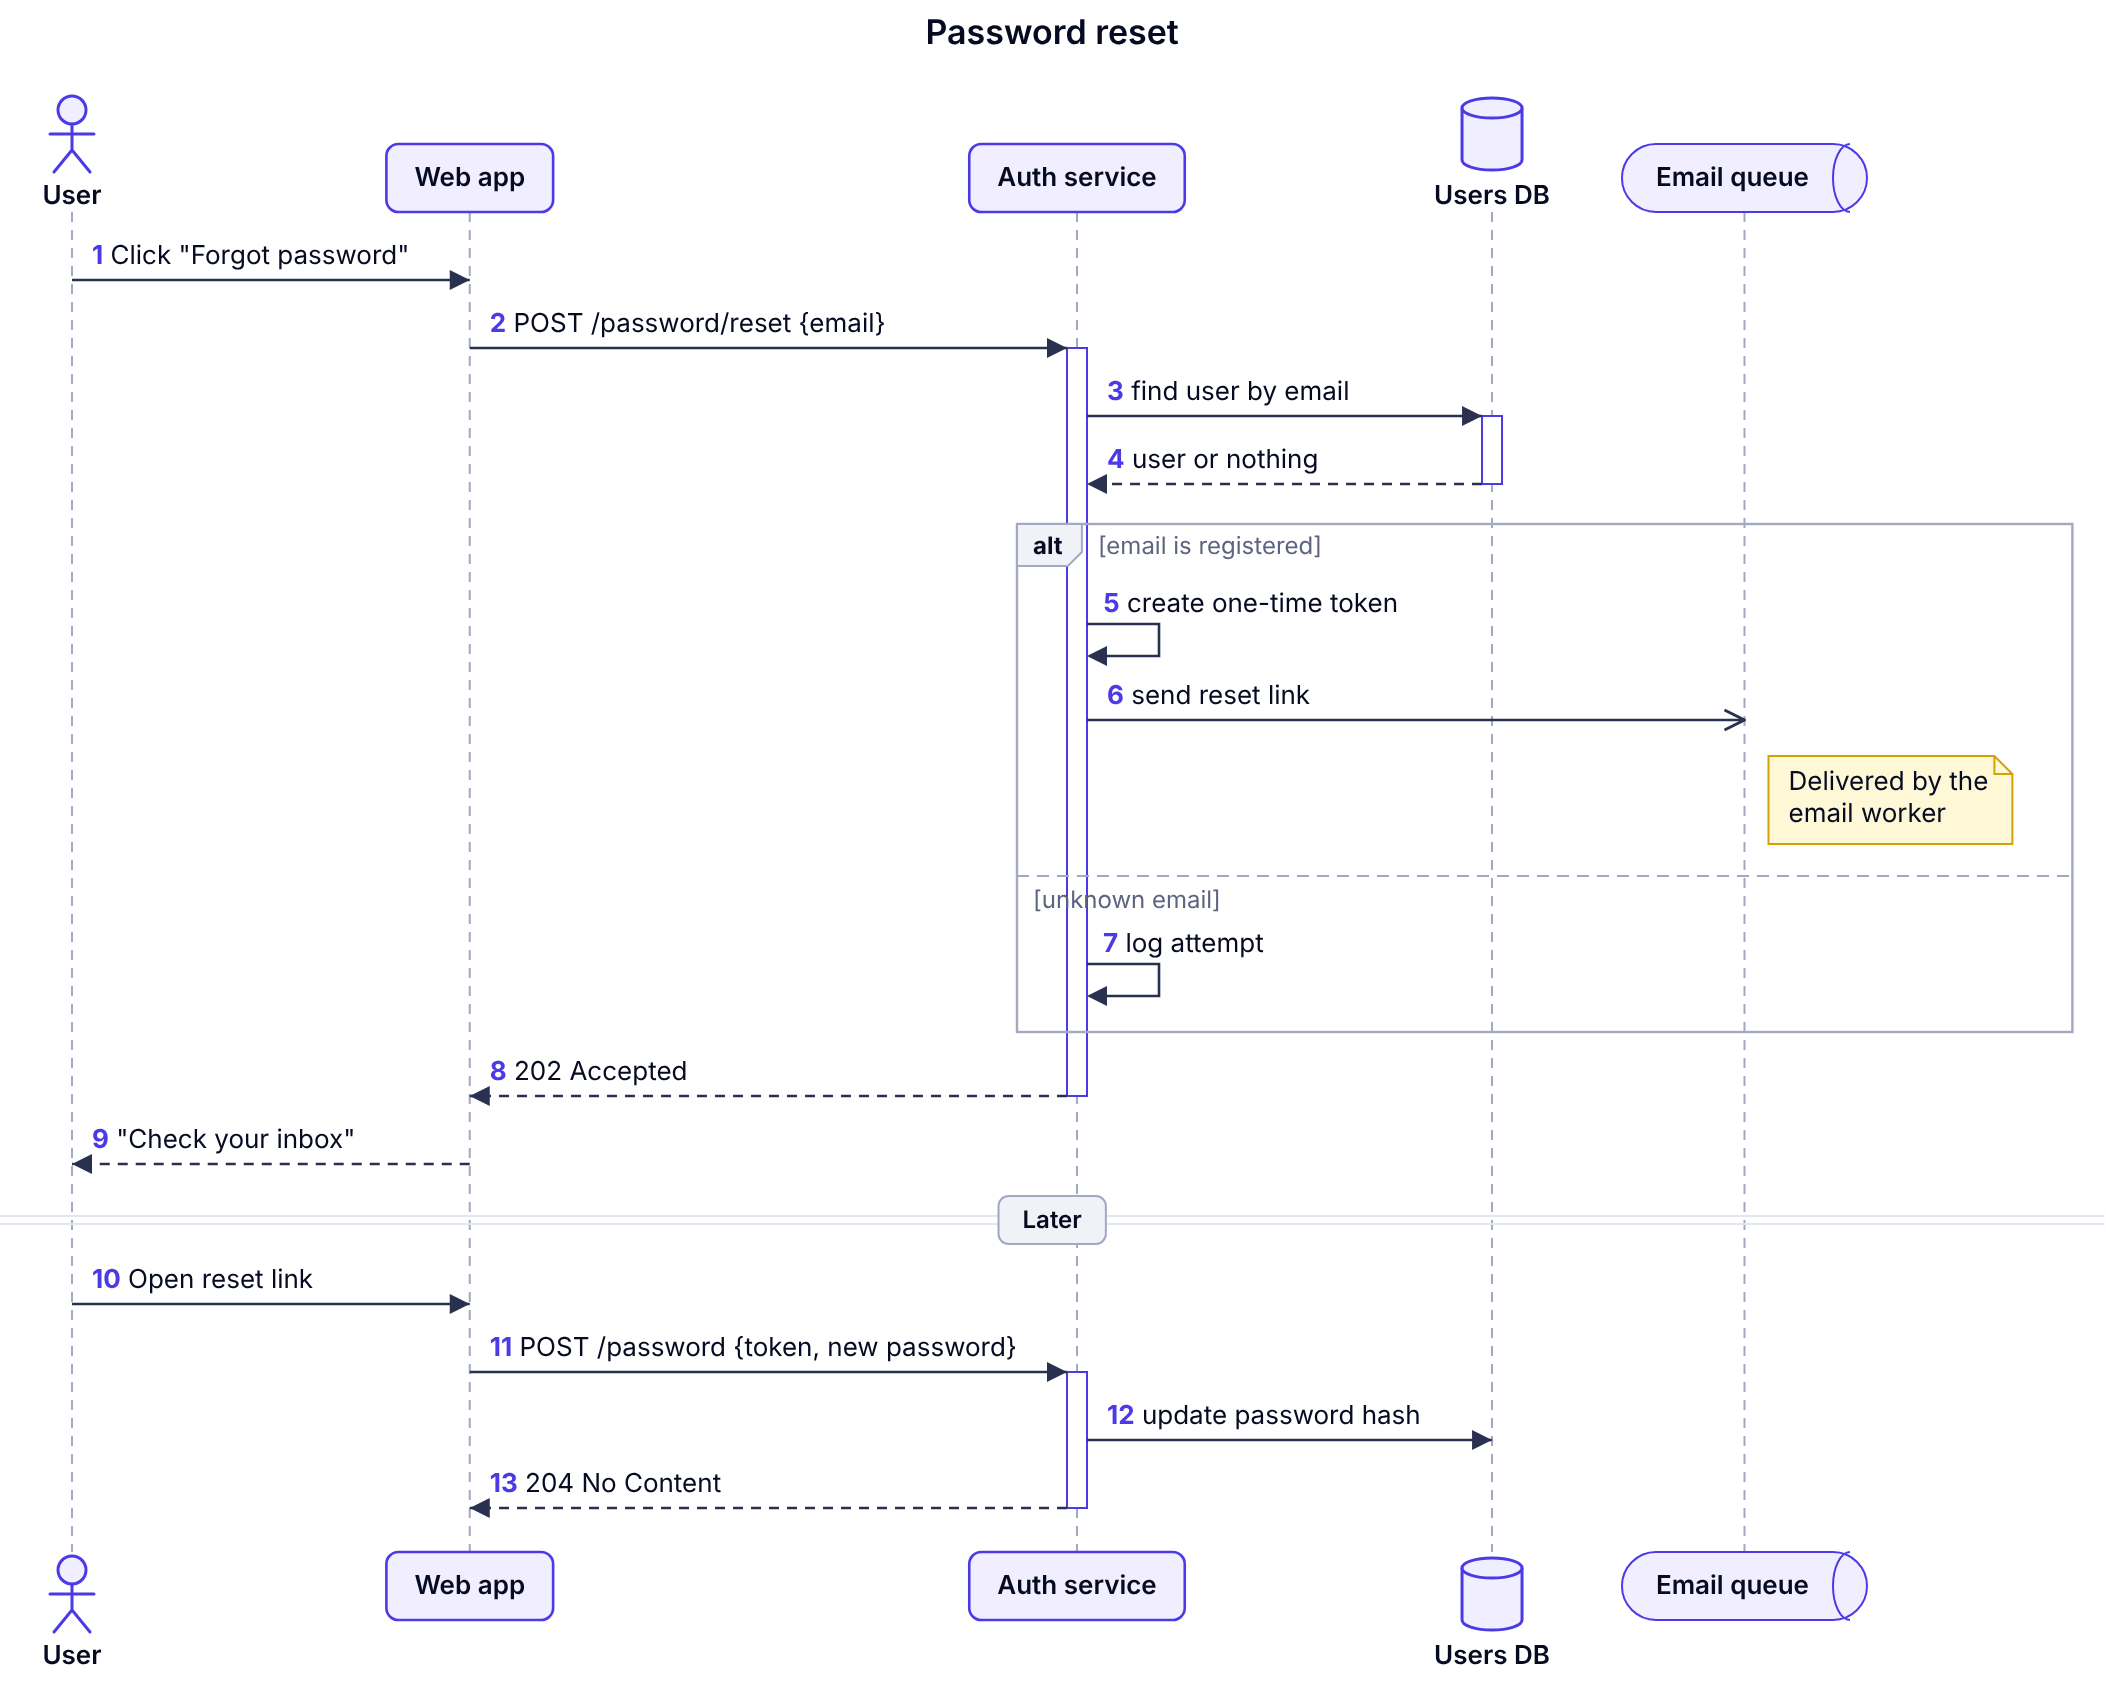
Notice that the response to the user is the same whether or not the email exists. Showing that on the diagram makes a security decision (not revealing which emails are registered) visible to everyone who reads it.
Tips for clearer sequence diagrams
- Keep it to roughly ten participants or fewer. If you need more, split the flow into two diagrams.
- Put the initiator on the left. Readers expect the flow to start on the left and move right.
- Show failures deliberately. An
altblock for the important error case is often the most valuable part of the diagram. - Prefer real names. Use the actual endpoint, event or table name so the diagram doubles as documentation.
- Leave out the obvious. Logging, metrics and retries inside a library rarely need arrows of their own.
Common mistakes
- Forgetting
endafter analtorloop. Dev Studio reports "group not closed with end" and points to the last line. - Using
--to deactivate a participant that was never activated. It does no harm, but the bar you expected won't appear. - Mixing up
->and-->. Readers assume dashed arrows are replies.